Table of Contents
Today marks the launch of the highly anticipated Project Dashboard feature for all our users—and it’s set to transform how you manage your outreach projects. Say goodbye to the days of manually reviewing projects individually to assess their status or take action on the next steps.
The Project Dashboard isn’t a single feature—it’s your new command center for overseeing all your projects.
Whether you’re deep in the trenches of outreach or overseeing the strategic direction of multiple campaigns, this tool is designed to streamline your workflow and make managing your projects a breeze.
Centralized Project Visibility
The most obvious immediate benefit of the Project Dashboard is centralized visibility into activities across all your clients and campaigns. The dashboard has tremendous flexibility to display the right information for you, but let’s quickly look at how the information is organized by default.
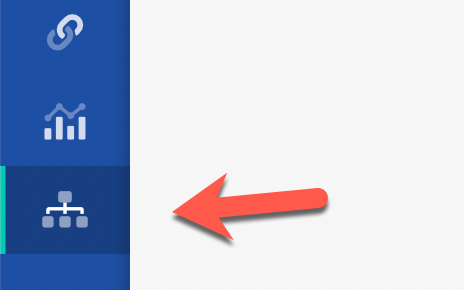
Accessing your Project Dashboard is super straightforward—just click the icon in your left navigation bar, and you’ll be there.
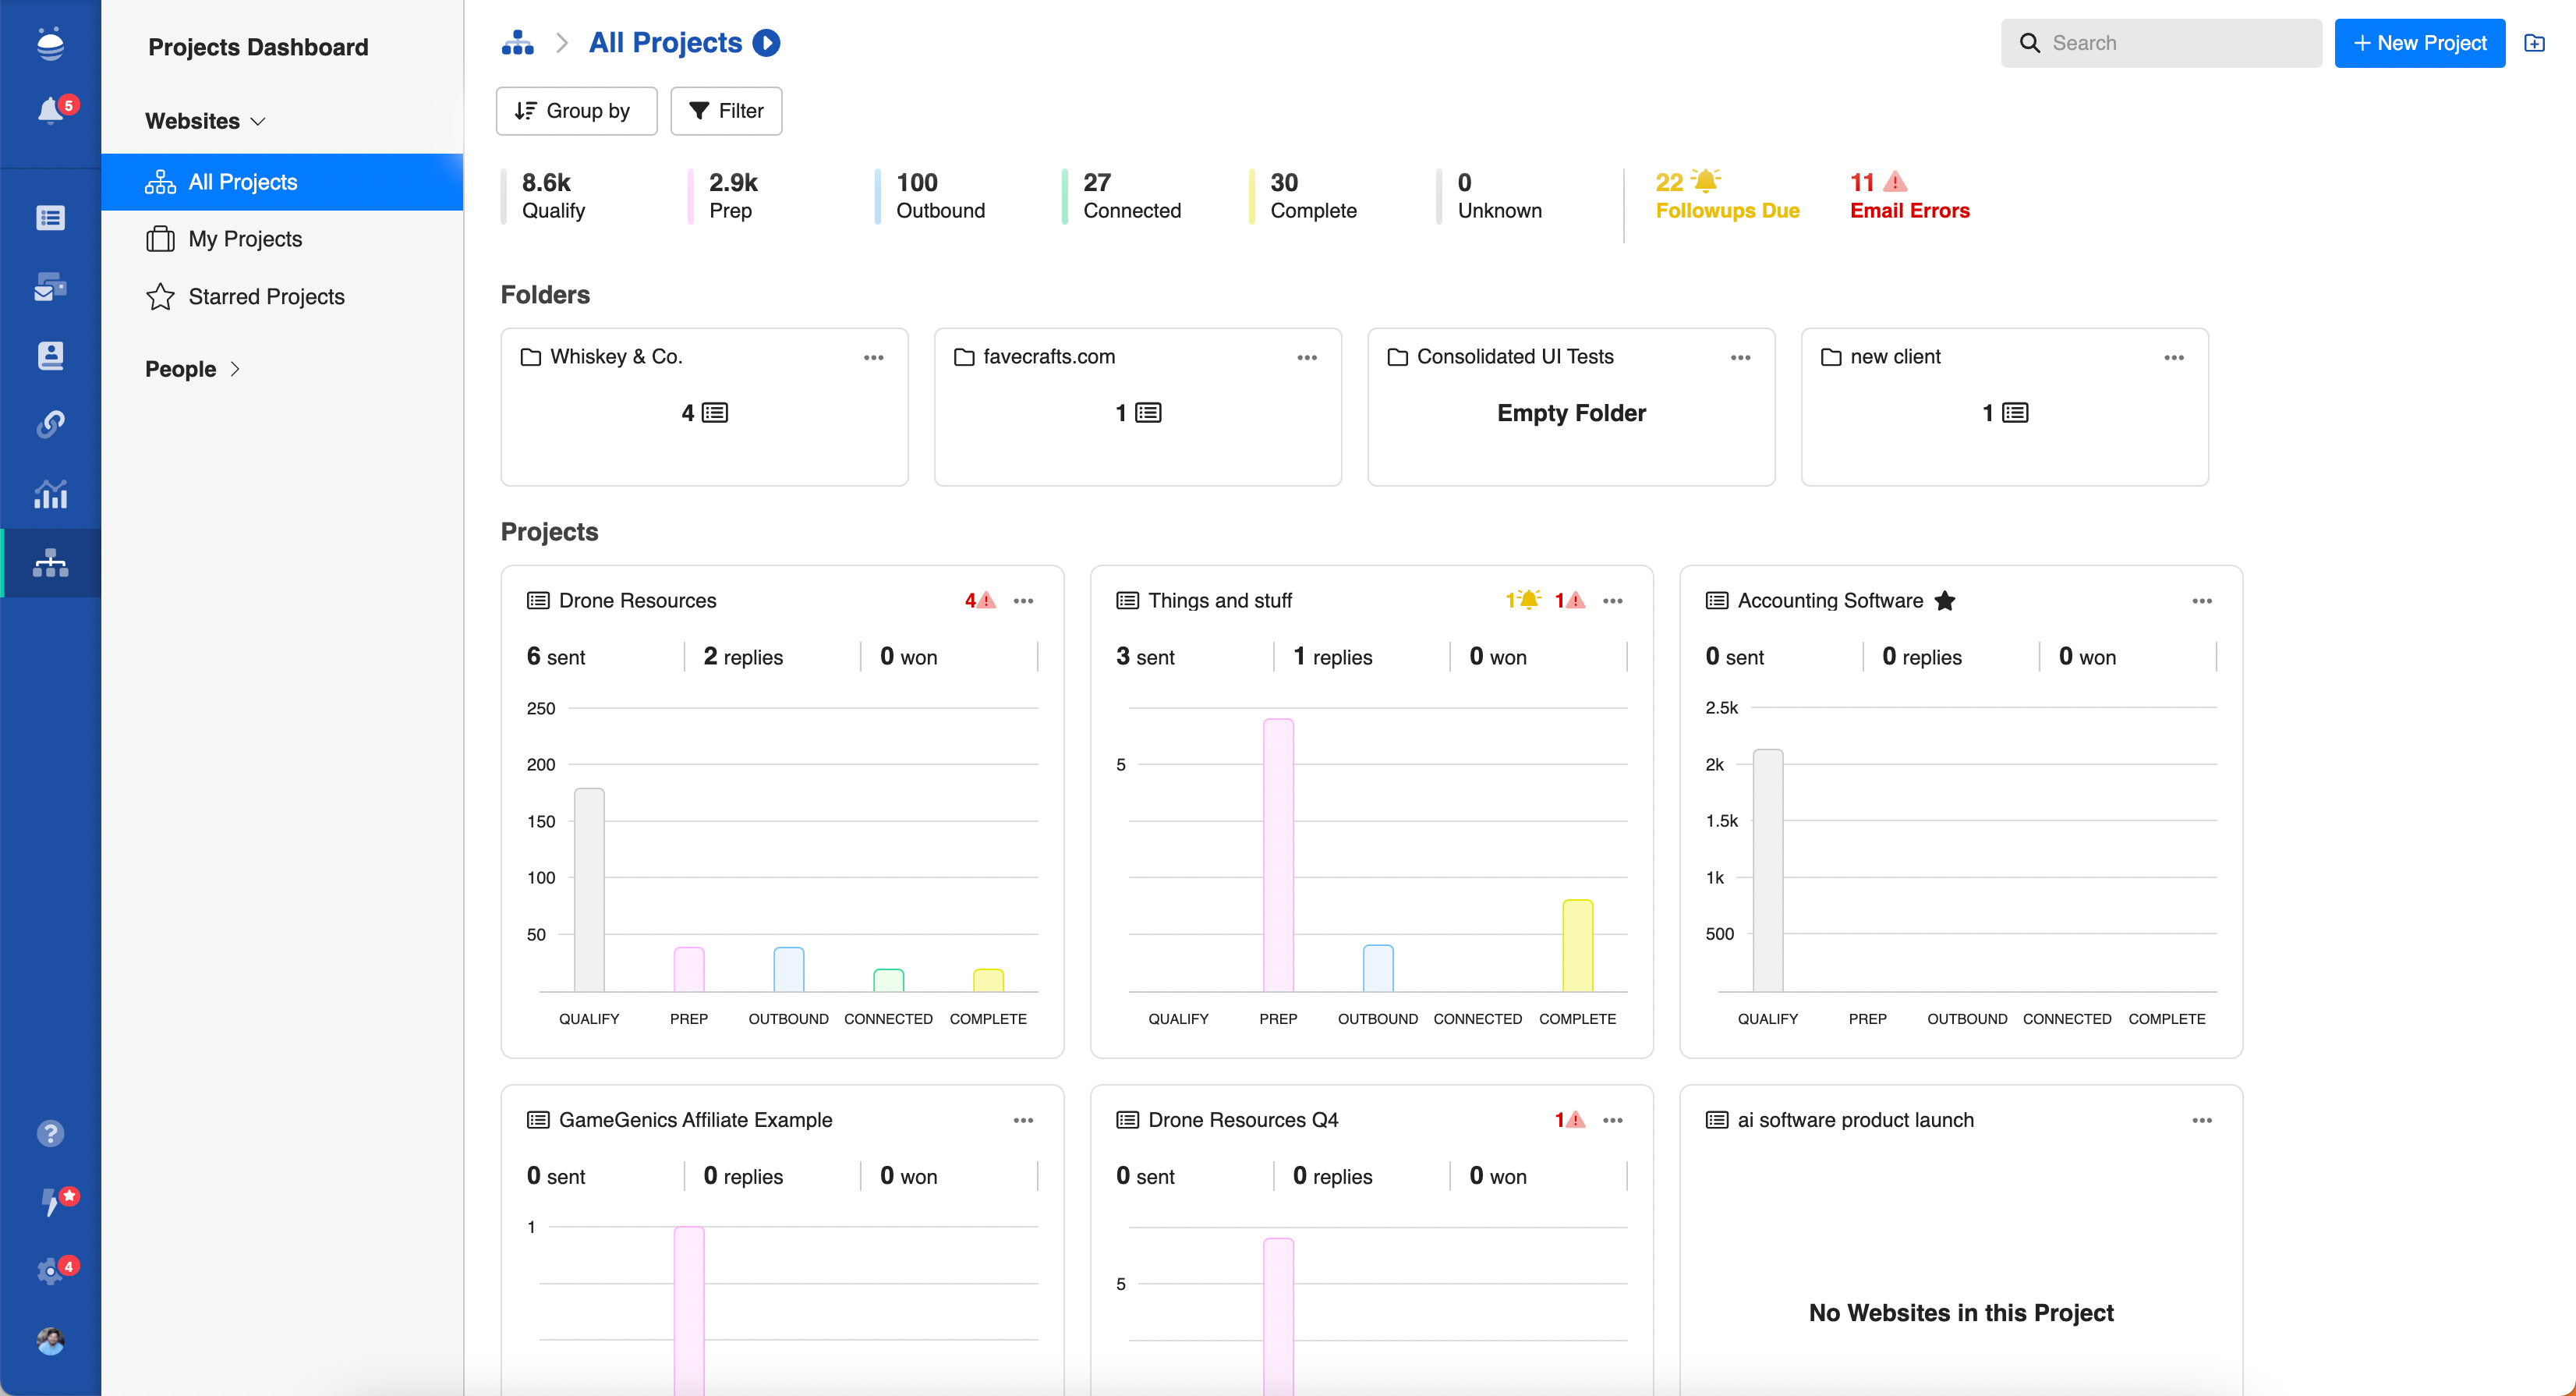
When you first access the Project Dashboard, you’ll see that the information there is organized into three distinct sections:
- Projects Overview
- Folders
- Projects
Let’s discuss the information in these sections in greater detail.
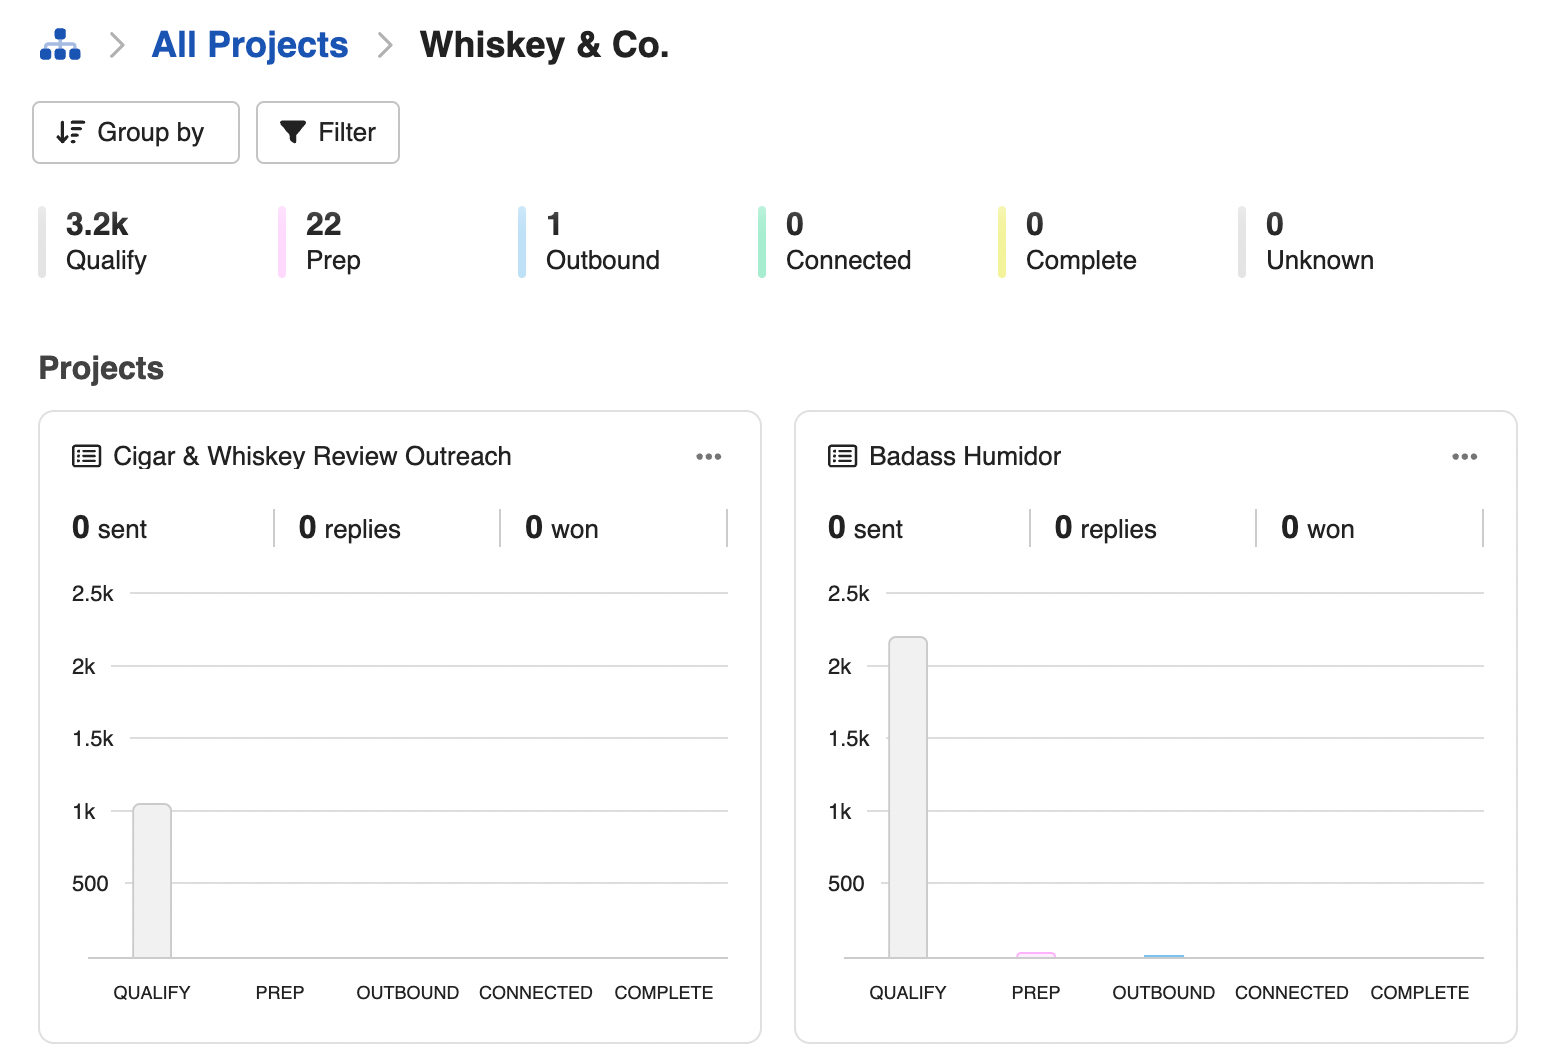
Projects Overview
The projects overview section exists at the top of your Project Dashboard and fittingly provides overall insights across all projects in your current view. It will display what project phase all contacts across all projects in your view currently exist in. We’ll discuss project phases in more detail shortly – but the general concept is that they are groupings of relationship stages that reflect what stage in your project’s lifecycle each contact exists in.

Using this information, you can get a general idea of how much activity is happening at each stage in your overall dashboard view, whether work is getting done, and where things are progressing normally or potentially getting hung up across your account.
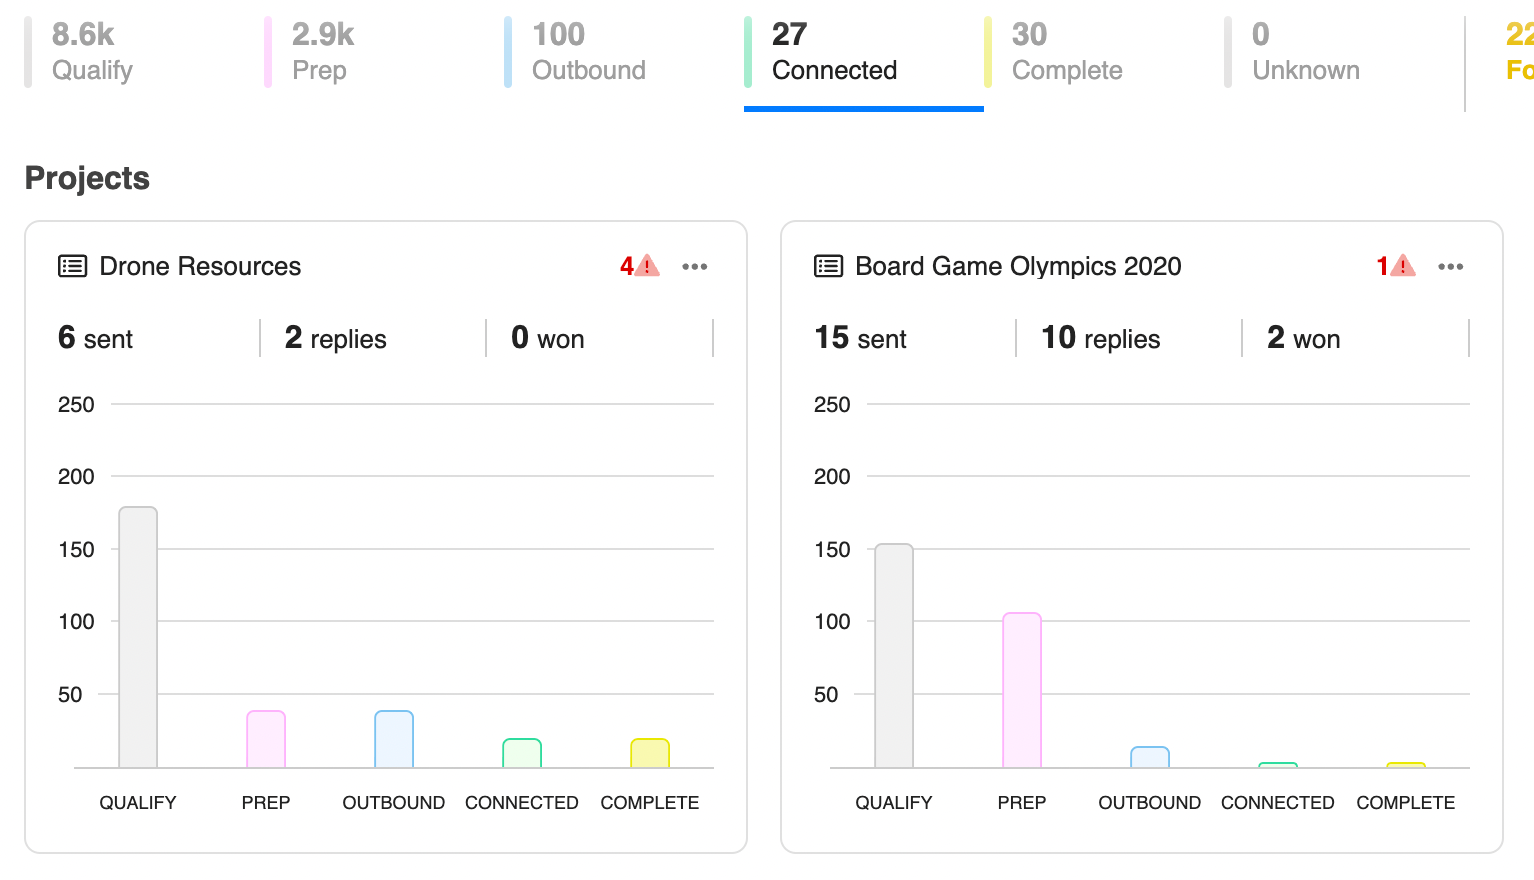
From the overview, you can also dive into projects that have contacts in a given phase or that have completed a certain outreach goal.
For example, if I want to see and manage all of the projects where we’ve gotten replies, all I have to do is click the “Connected” phase and I’ll see the full list of relevant projects with contacts in that state.
You can change the information displayed in your dashboard view in several ways.
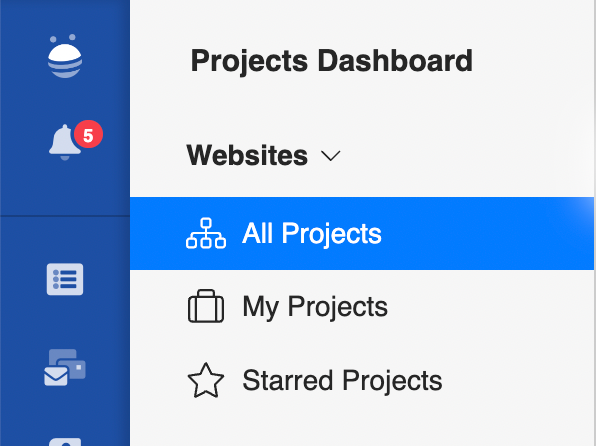
If you have “manage projects” privileges in your account, you’ll be able to see all of the projects in your account, whether you’re assigned to them or not, by default, to get visibility into key activities across clients and campaigns.
If you’re not a manager for your outreach team but are concerned with the projects you are working on specifically, you’ll be able to see “My Projects” from the projects view dropdown.
You could also select “Starred Projects” to see only specific projects that you have defined as being particularly important.
Another way to change the view is by diving into a specific folder – which brings us neatly to our next section.
Folders
Folders, as you might expect, are based on your folder organization in your BuzzStream account. At a top level, you can review these folders to see the number of sub-folders and projects that exist within each.

When you click into a folder or sub-folder, you’ll notice that your view changes. Now, you are seeing a dashboard view specifically tied to that folder.
From here, you can get high level visibility into each folder. Often, that means understanding what is going on at the client level or campaign type level, giving you top-level insight targeted to where it matters.
Want to know how things are progressing for that new client you onboarded? Or how are your overall campaigns performing for a given initiative?
Your folder view makes getting that insight as easy as a click.
Projects
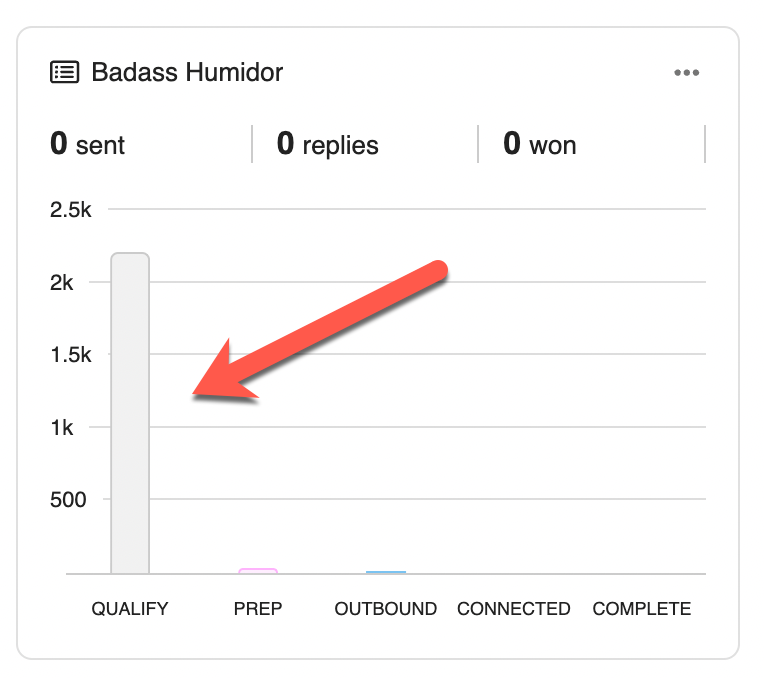
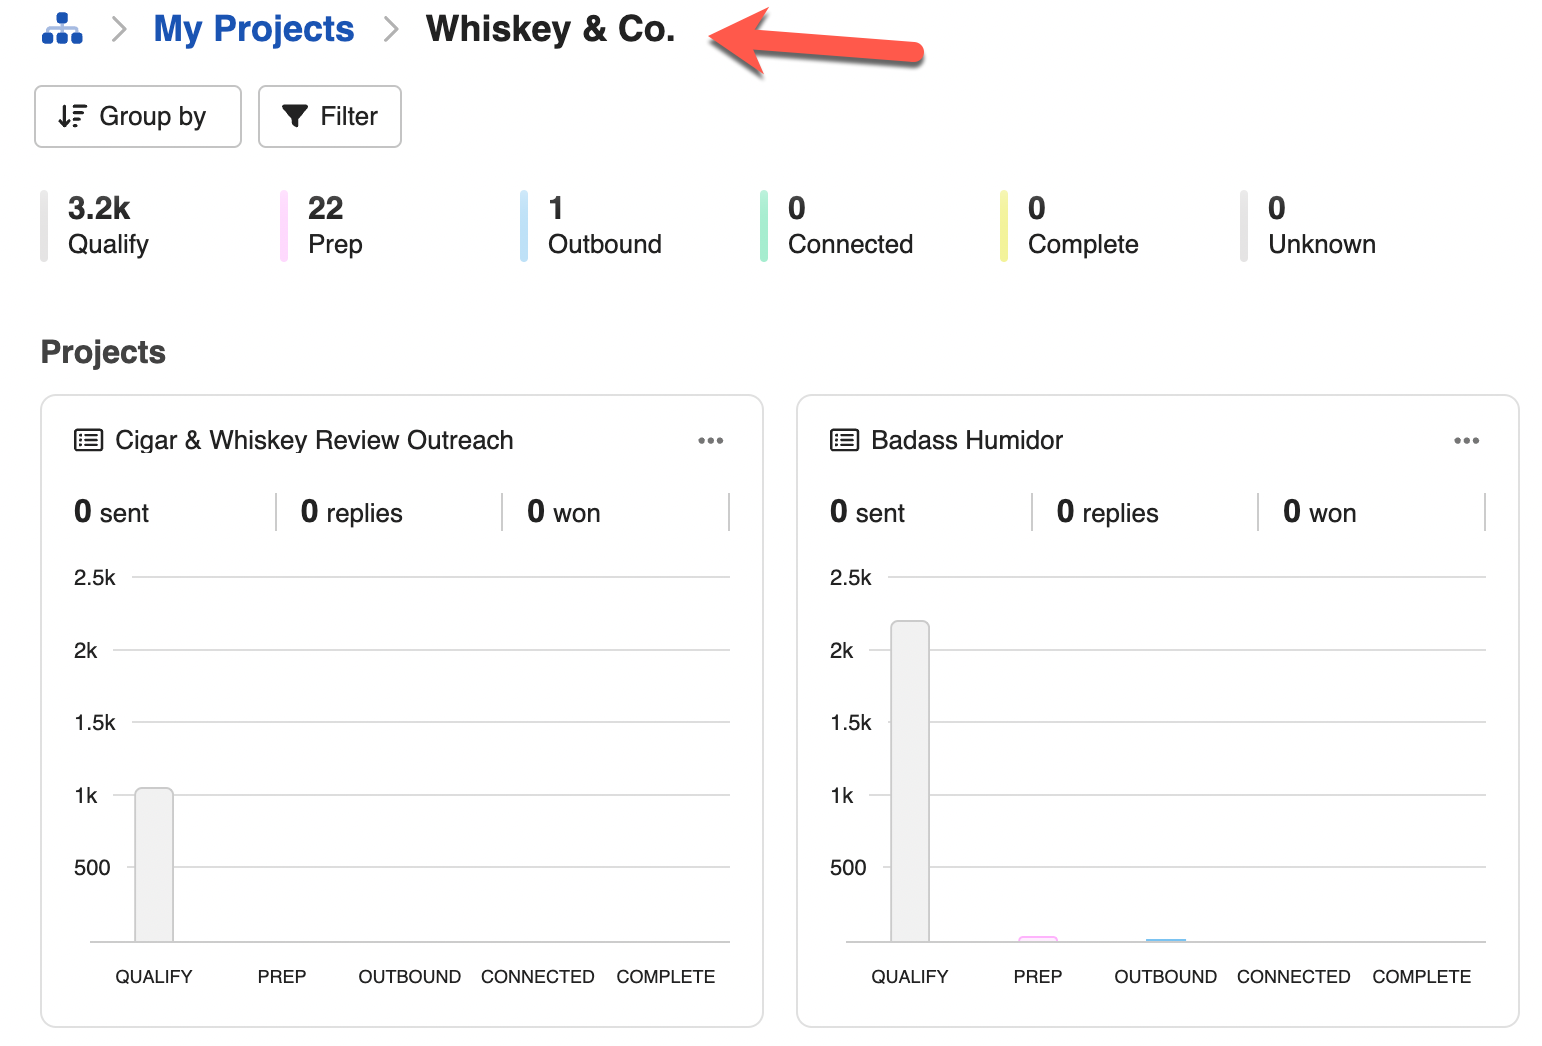
Your projects section is where the real granular insights and actionability happen in your campaign dashboard. You’ll see in this section that each of your projects in your view is broken into a project tile.
For each of those tiles, you can get a quick visual representation of where every contact in that project currently stands.
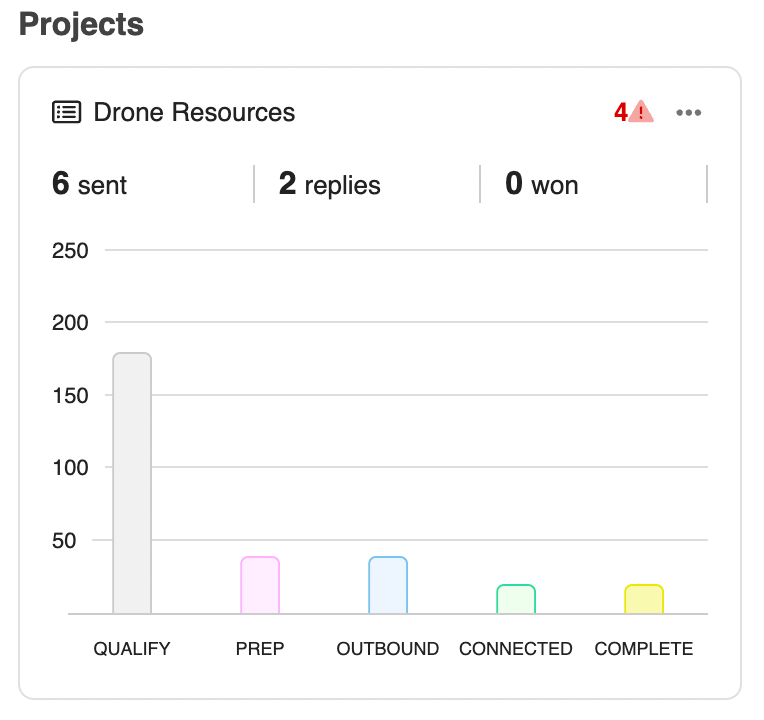
Looking more closely at the project tile, you can see that you have visibility into what campaign phase each contact is in, as well as top-level email metrics, notifications, and error messages.
Efficient Project Actionability
Your Project Dashboard doesn’t just provide insight. You can also take critical actions on many different aspects of your projects right from the project tile.
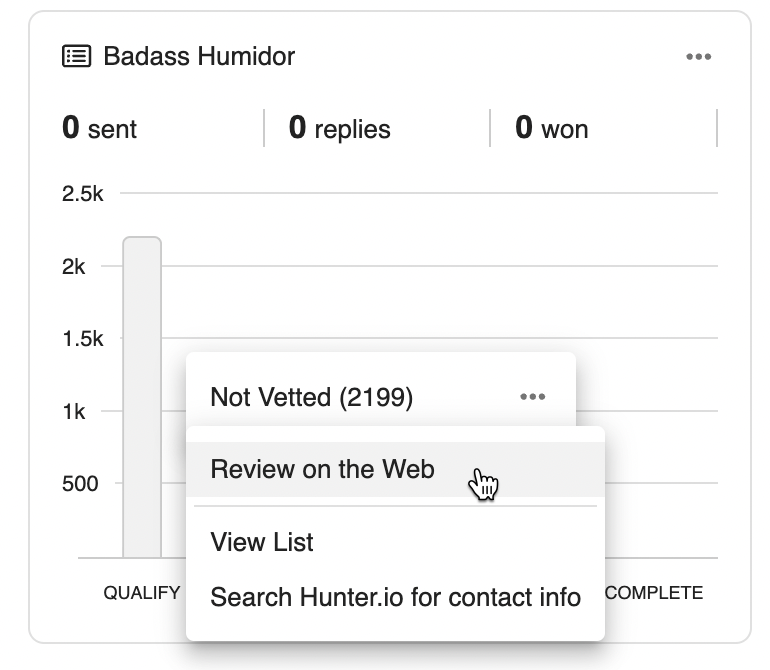
Many of these actions are phase-dependent, and you can view those actions very easily by just clicking on the outreach phase in your project tile of choice.
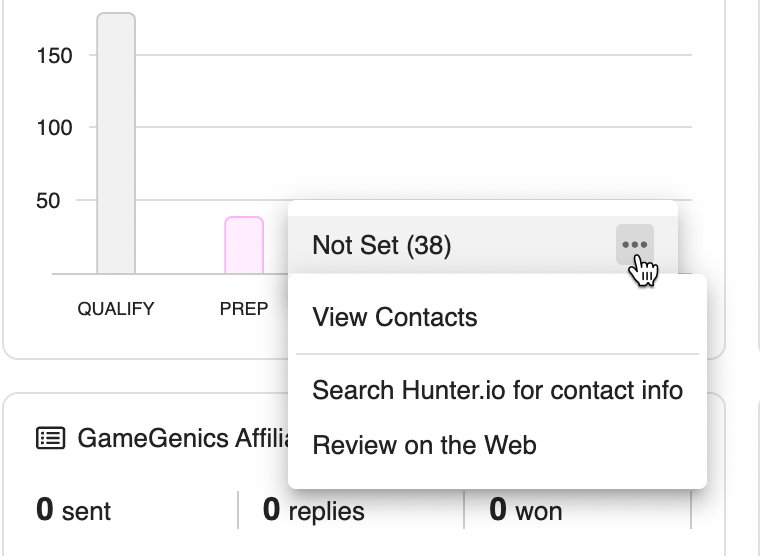
These contextual actions vary by phase, but you can use them to:
- View the list of all contacts that exist in that phase
- Launch into a BuzzMarker “Review on Web” workflow
- Search for contact info using our Hunter.io integration
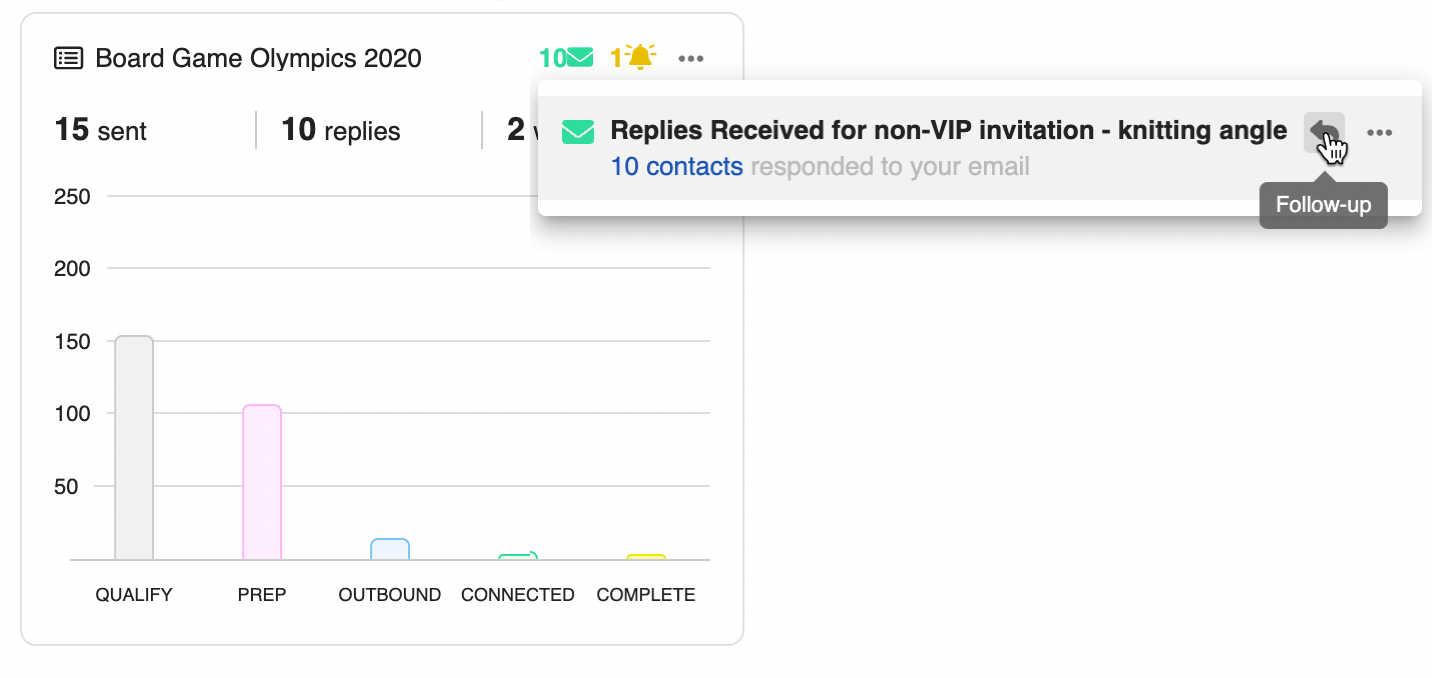
In addition to phase-dependent actions, you can also directly respond to project notifications or errors.
Just click into the alerts section of your project tile to see all the actions you can take to resolve errors, stay on top of follow-up reminders, and complete other critical tasks.
Consolidated Project Phases to Unify Visibility
Now, let’s turn to those project phases we’ve been discussing to explore them in a little more detail. As discussed, project phases describe where each of your contacts exists in the general project lifecycle.
Those phases are:
- Qualify – Discover and vet prospects for your project.
- Prep – Get your contacts ready for outreach. This can include finding contact information and gathering info you’ll need to personalize or populate your sequences.
- Outbound – Manage your sent and scheduled outreach to contacts.
- Connected – Review contacts that you are currently in communication with.
- Complete – View contacts that have completed their outreach cycle.
Now, if you are familiar with BuzzStream, you are likely already asking yourself: How the heck do these phases get populated? And what happened to my relationship stages!?
No need to worry dear reader, your stages are all good and well and are in fact integral to how project phases get populated!
The first time you open the Project Dashboard, whenever you click “configure phases,” you’ll be taken to the “Edit Relationship Stage” screen. Here, you’ll see a list of all of your relationship stages to the right and all of the project phases on the left.
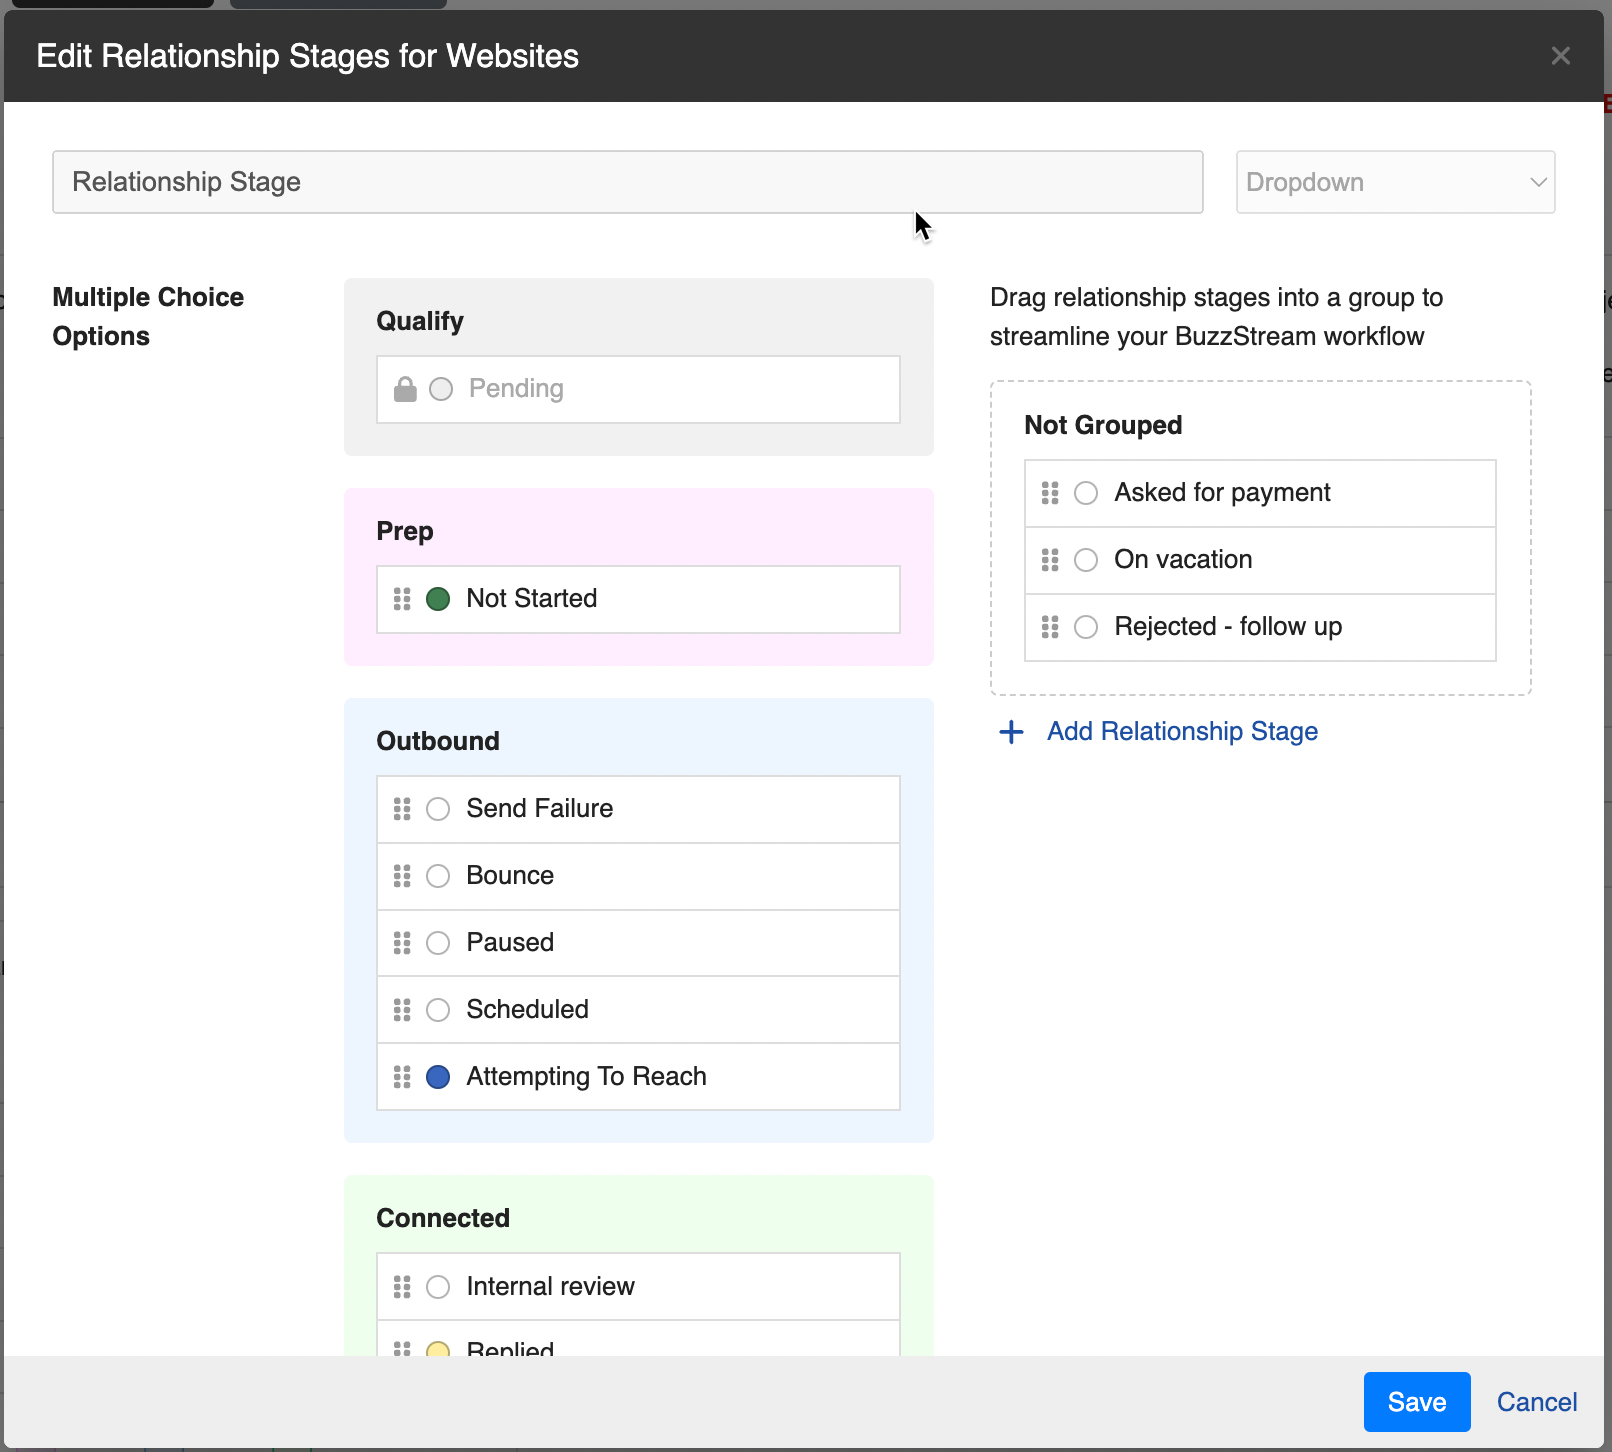
Populating your phases is simple. Just drag your relationship stage of choice into the most applicable project phase, and it will begin populating that phase with contacts that exist in that given relationship stage.
And by the way, we’ll make a best guess on how to organize your stages, but you’ll likely want to review and adjust those to make sure they fit your expectations.
By handling phases this way, you’ve got all the flexibility to define relationship stages however you like, while still giving you unified visibility into where your projects stand. These can be modified at any time if the nature of a stage changes, or if you add a new stage that applies to a given phase.
Using the Project Dashboard
Now that we’ve given you an overview of all the different components of the Project Dashboard, let’s see a few examples of how you might use it.
Scenario 1: Overview of your team’s recent activity
Let’s say you’re managing a team and want to get an idea of what they’ve been doing recently and where things might be falling through the cracks so you can take action.
This is a snap in the Project Dashboard. Just enter the “All Projects” dashboard view, then sort projects by last opened. You’re now presented with a list of projects that your team has been working in recently.
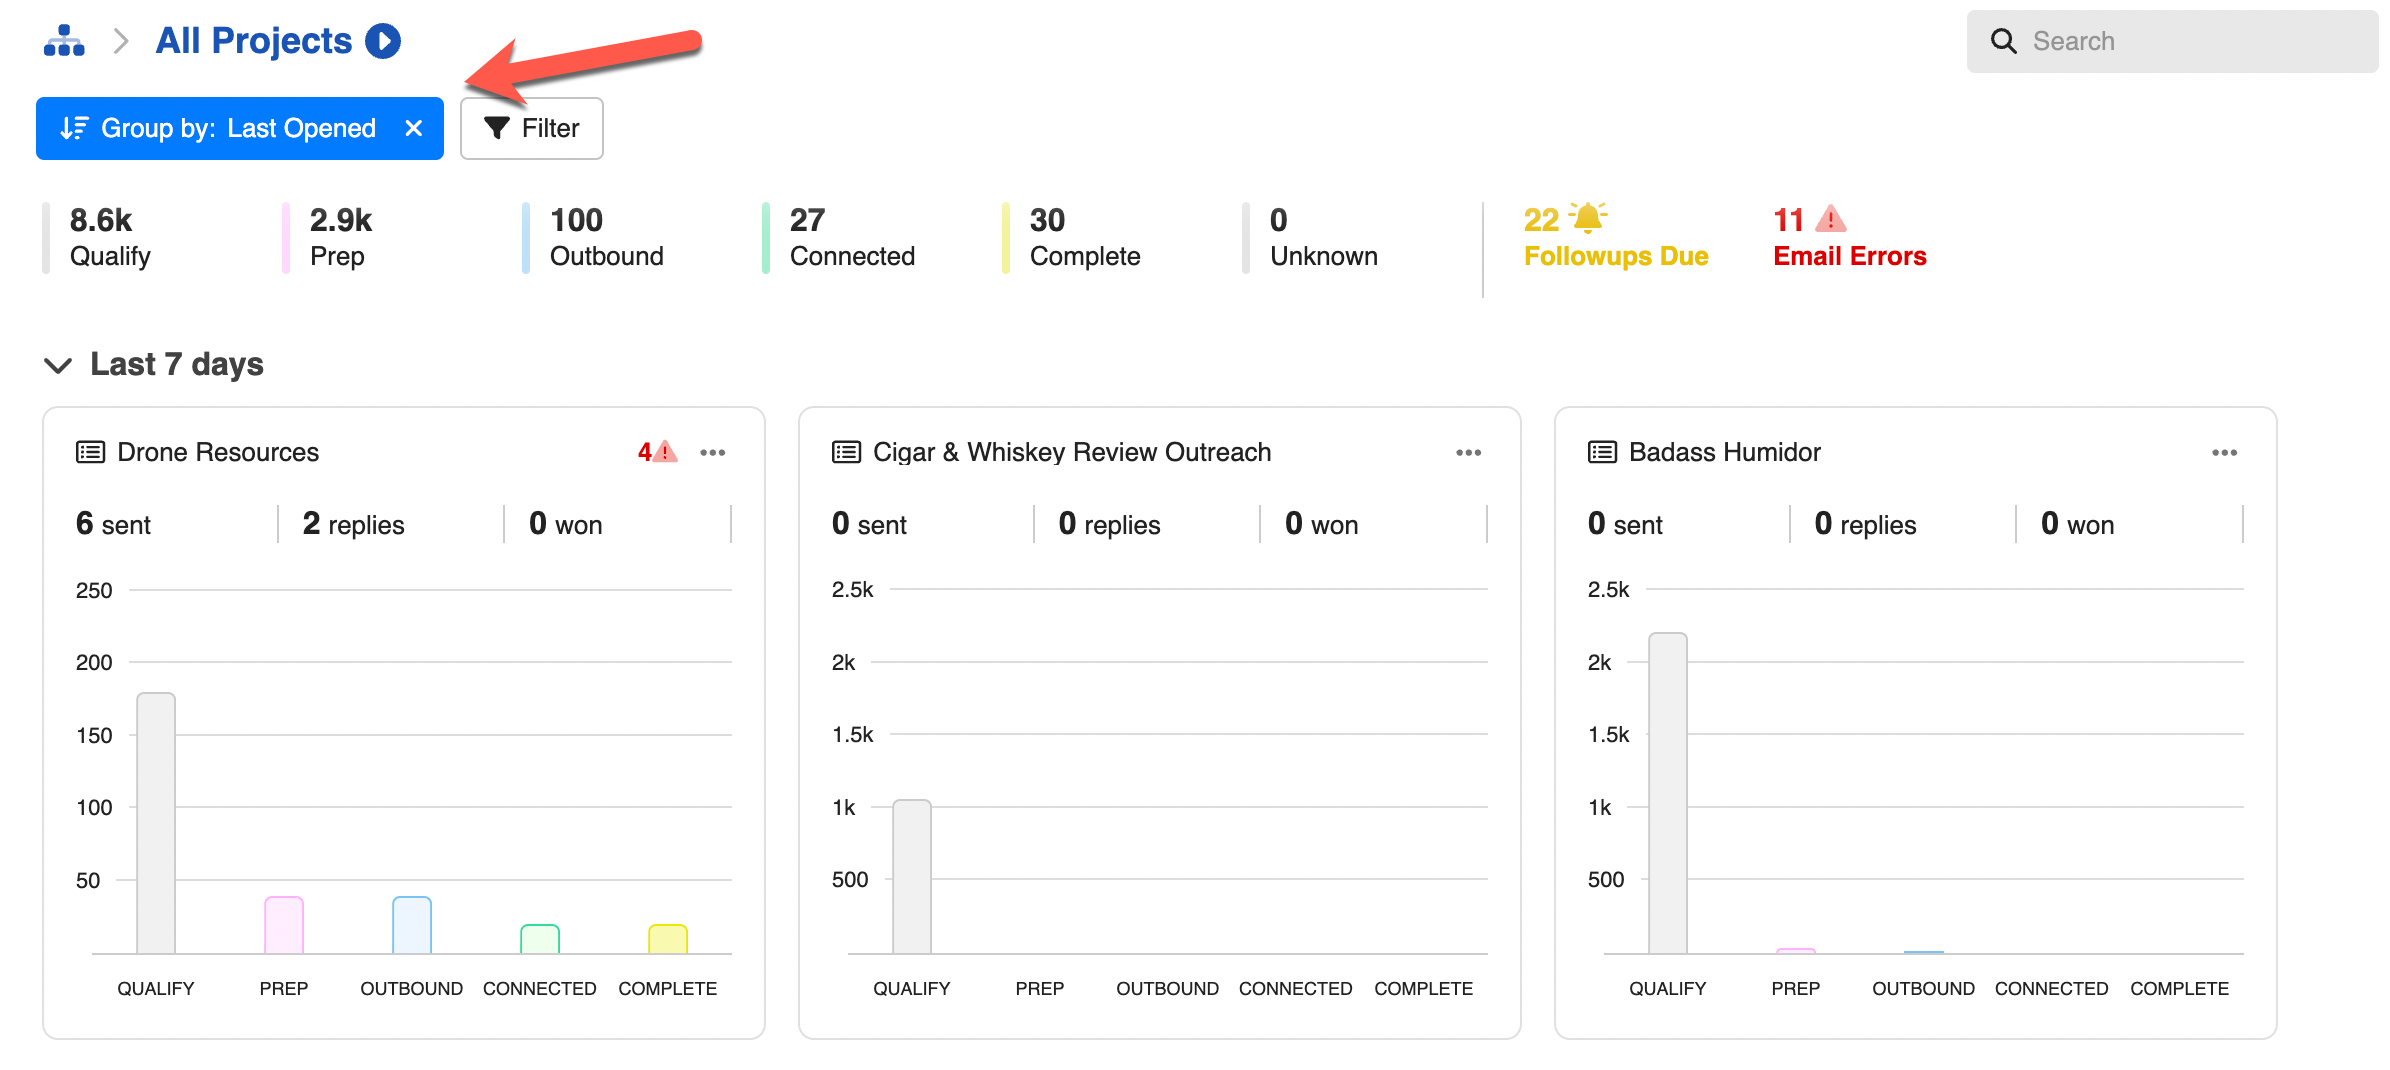
From here, you can look on a per project basis and determine whether you need to take action. For example, you might see that a project has a lot of contacts in the Qualify phase, but very little in Prep or Outbound.
That might tell you that your teammate has hit a snag in their prospect qualification, and you can engage with them to figure out what needs to happen to move the campaign forward.
Alternatively, you can take action directly by clicking on the qualify phase, then launching into a Review on Web workflow to qualify those prospects directly from the project tile.
Scenario 2: Managing replies across all your projects
In this scenario, you have several active campaigns and are starting to see replies coming in. You can manage all of those from the projects dashboard so you can make sure nothing is getting missed.
To do that, just make sure you’re in the “My Projects” view in the dashboard, then click on the “Connected” phase. You’ll now be presented with a view of all your projects that have replies.
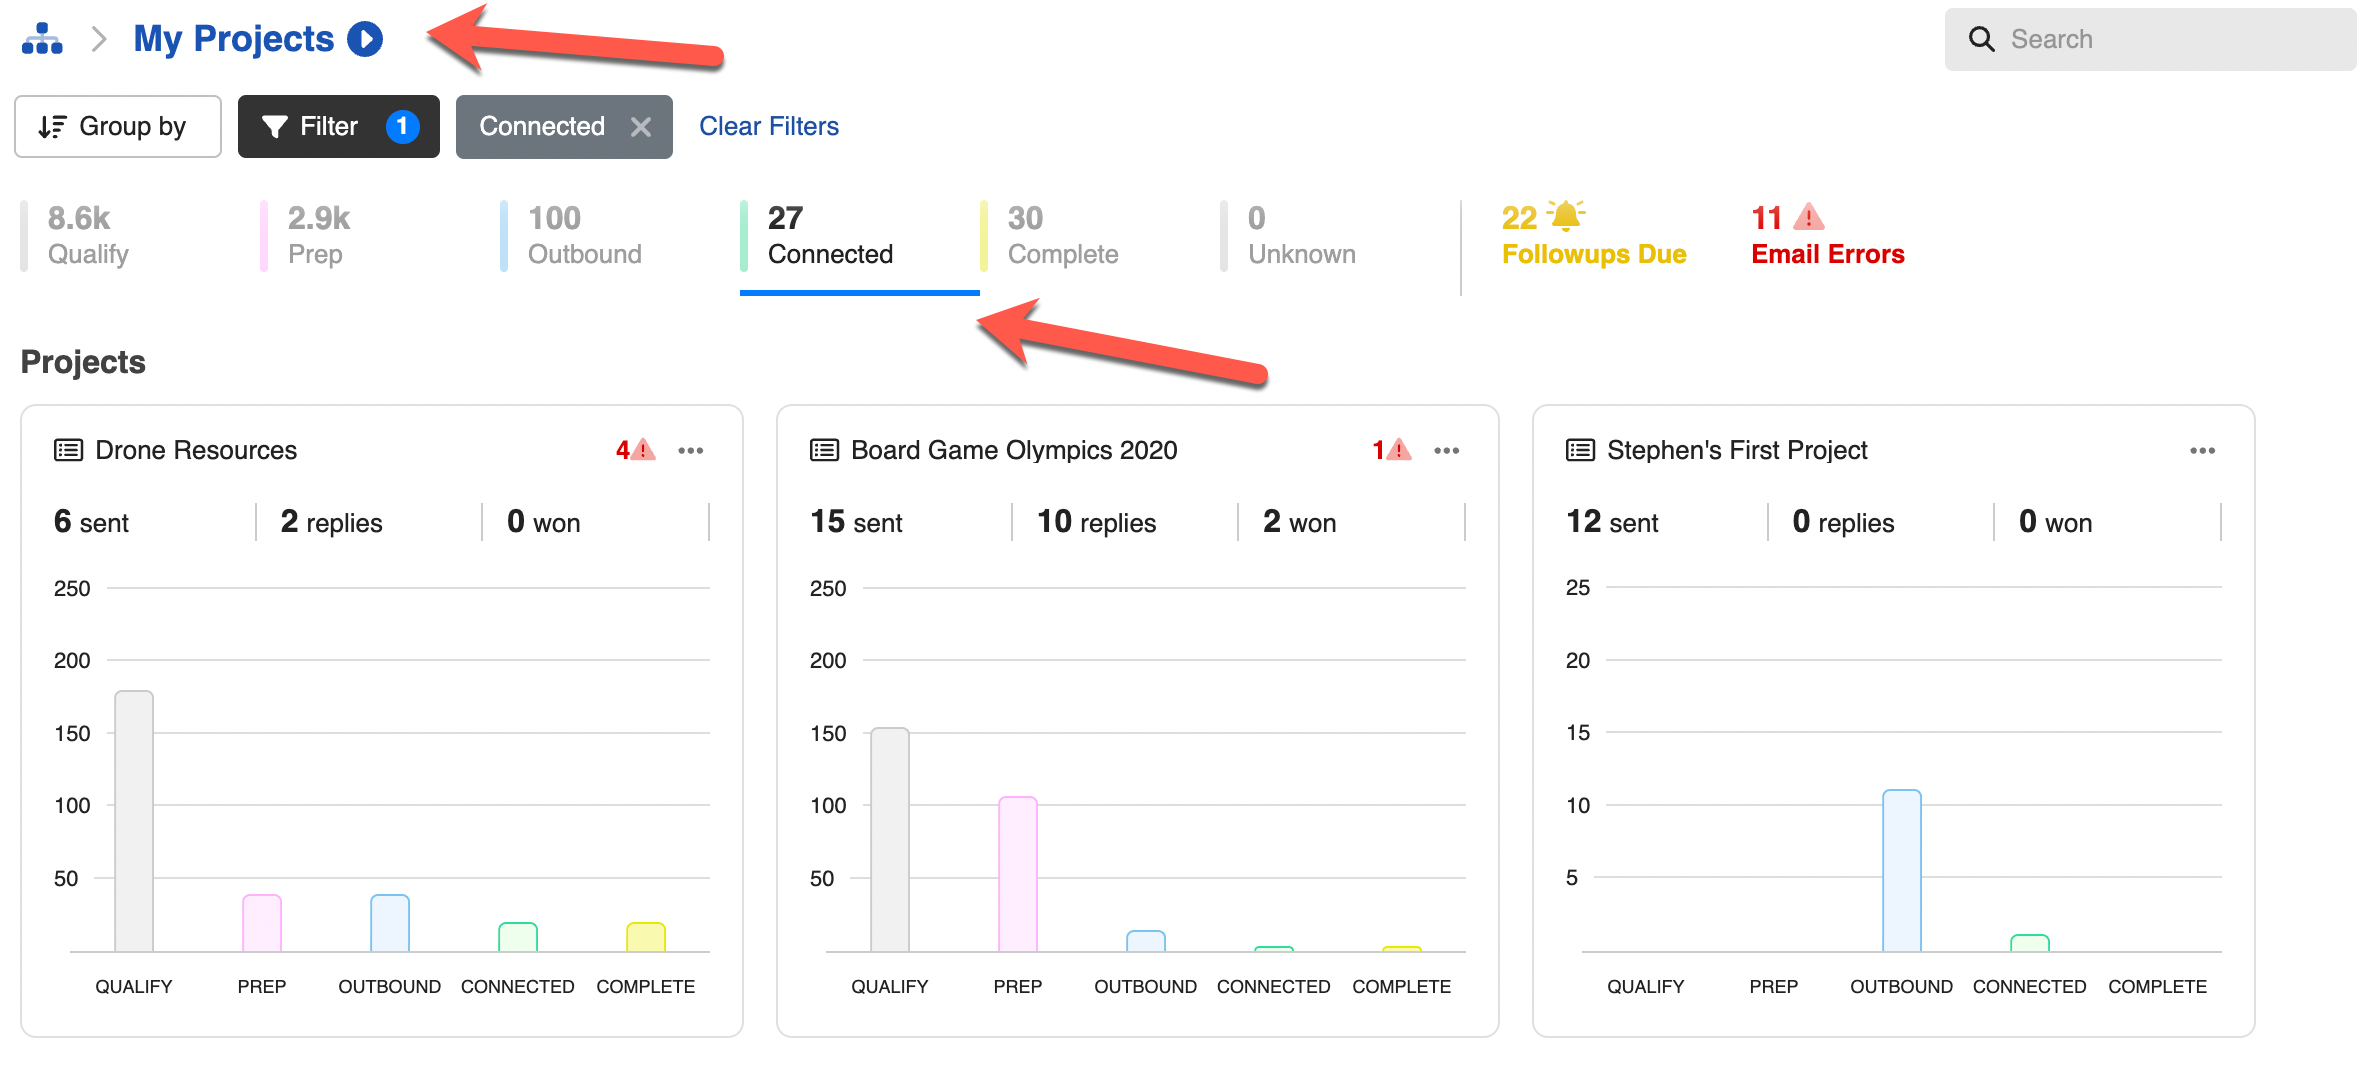
From here, you can take action on those replies by clicking the “Replies” icon in the project tile.
This will prevent you with the ability to launch directly into your outreach module to follow up on those replies, working through your projects and replies systematically.
Scenario 3: Get visibility into client campaigns
If you have organized client campaigns into their own folders, then the Project Dashboard can make staying on top of campaigns for key clients easier than ever.
To review and take action on client campaigns, make sure you have all of the campaigns for a given client organized into a client folder. Then, just click on the corresponding client folder from the Project Dashboard.
From here, you can see all ongoing campaigns for your client, giving you the insight to take action as necessary to make sure you’re progressing in line with your client’s needs.
Video Overview
Want a video overview of how the Projects Dashboard works? Your wish is my command!
Wrapping Up
As you can see, we’ve barely scratched the surface of the powerful capabilities of the Project Dashboard in BuzzStream. There is tremendous flexibility here, and we’re excited to see the inventive ways that our users can leverage this tool to get greater insight and actionability into their campaigns.
As always, we’d love to hear your feedback. Let us know what you think, and if you have any questions please let us know!

 Check out the BuzzStream Podcast